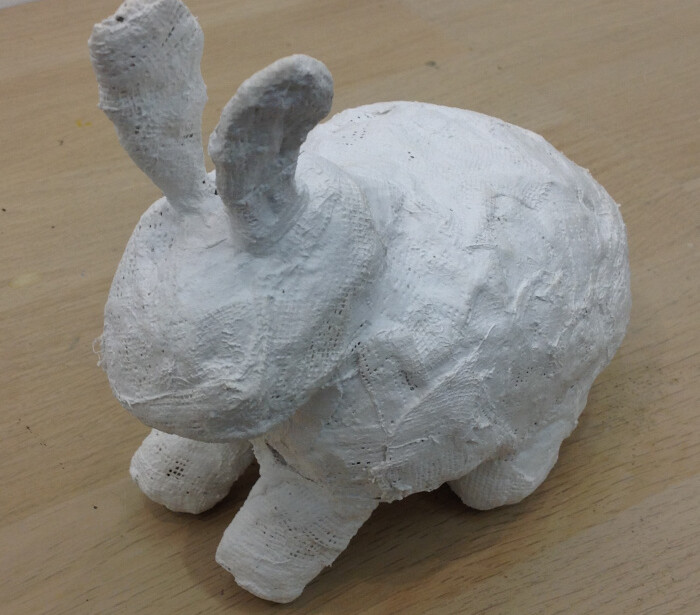
This week we were ready to add modroc to the wire sculptures we made last week. Though of course for some, the wire was a perfect medium for their creatures and they started afresh today. The trick with the modroc is to keep it wet while you’re working. If you let it dry it’s harder to add more layers, or to alter the ones you have. For this you also have to keep your water fresh – once it’s cloudy it needs replacing.…
So this week we tacked oil pastels. Technically this is painting but it feels much more like drawing. To create the most vibrant colours I suggested using three colours which are close together on the colour wheel in every section – so never using one pastel on it’s own. Then if you use each one in small circles, leaving tiny gaps, rather than blocking in an area like a felt tip pen, when you add another colour to fill in the gaps you…
This week we made articulated creatures – so creatures with movable limbs. This activity really tested the kids’ ability to think like an engineer. After drawing their creature normally they had to work out which parts would move, then draw those parts separately, scaled up, not forgetting to include space for the parts and the body to overlap to contain the join. Not as easy as they first thought! The joins were simple wire spirals made on the front and back. This enabled…
This week we tackled autumn leaves in watercolours. They really are the most beautiful subject, i think, and perfect for this tricky medium. There are techniques for all levels from patient layering, fluid experimentation to even printing with the leaves (and combining all these as well!). Really the only proper rule is to start with the light colours first. The beauty of watercolour is all about letting the white of the paper shine through, thereby utilising their amazing, and unique, transparency. Then you…
This week we had great fun designing and making stencils. Using craft knives very carefully and either card or acetate the kids made really fun and interesting stencils, which they then worked with very imaginatively – working out how they could overlap as well as playing with the colours (high contrast worked well) and the sponges on sticks we used were great to blend with. It’s a really versatile print making technique.
Woo we are back – old and new faces, and a new class for teenagers! First week started irreverently with ‘updating’ (which could mean defacing) our collection of art magazines. I wanted the students to choose an image that resonated with them and find a way to change or update it. This could be with scissors, marker pen and/or the photocopier. Love what several did with splicing different images together (or the same one, changed) or using the photocopier to multiply the image.…
As autumn approaches I’ve been thinking back to the fun we had during the summer holiday classes. We sculpted, painted, constructed, drew, stamped, built, cut, stuck, collaged, printed… and more! Particularly loved the papier mache constructions so simple but effective. Make simple cardboard and/or newspaper base – we had a rabbit, a bus, a boat, a crown, a cake – it really can be anything as long as it’s stable enough – and then cover it in newspaper strips dipped in diluted PVA.…
This week the challenge was to make sculptures out of some sheets of white paper (and some tracing paper for an interesting alternative). After demonstrating how to safely use scalpels I showed them some basic methods to start with, but many invented their own methods. No sellotape and only small amounts of glue were needed to make these intricate and delicate sculptures – some were creatures, some were abstract, all were beautiful. This was a challenge set by Josef Albers to his students…
