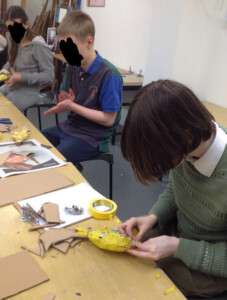
These two weeks we were busy with paper clay sculptures. Paper clay is a kind of paper mache, but the paper is mulched first before applying to the armature. I used this recipe from Jonni Good and it worked really well.
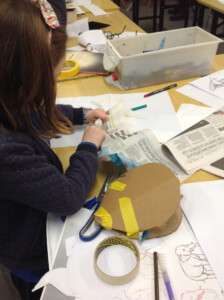
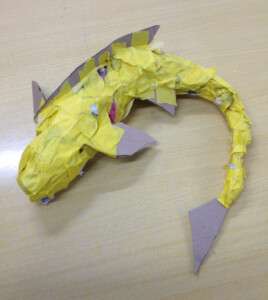
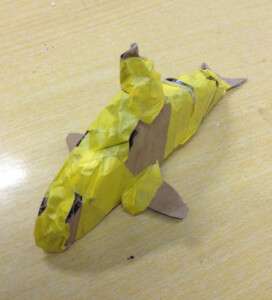
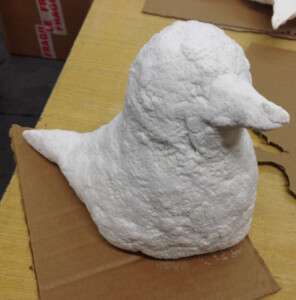
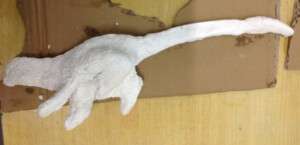
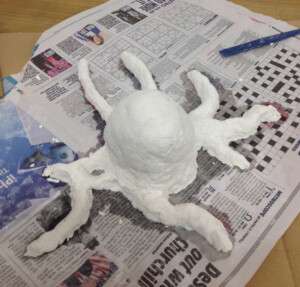
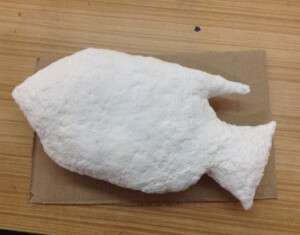
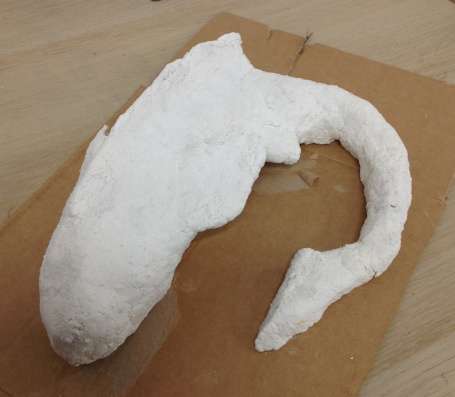
The first step is to create the armature. What worked best was cardboard and scrunched up newspaper (careful to scrunch up the newspaper as tight as you can) but wire is also possible. Its really important that the sculpture is as tight and strong as possible – this is where the cardboard is helpful as the paper clay contains water so can make the sculpture soggy and then it may not hold its shape. Anything with long limbs is fairly advanced so be careful – it may be best to have your creature sitting down! Attach the scrunched up tissue paper to the cardboard with masking tape. The simplest way is to draw your creature (or whatever) sideways on the cardboard and then cut it out. You want it not too small (the card may be too stiff to squeeze in for the thinner parts) or too big (which might make the finished sculpture unstable). About the size of a coffee cup seemed to work best but it depends on the form really. If the shape is simply you may be able to simply add scrunched up tissue paper to either side of this cardboard, to make the body. If it’s more complex – eg. with legs, tails etc – I’d suggest having two pieces of the cardboard with newspaper inside, and then extra on the top to round out the body.. Or you can go straight in just with newspaper and masking tape but be careful to go tight. This is what Nina did with her carp because she wanted it to curve, which wasn’t really possible using the side on drawing as the base. If doing something much more regular and straight, like Simon’s empire state building, or Agnieszka’s perfume bottle then newspaper isn’t necessary – you just need a very solid cardboard sculpture.
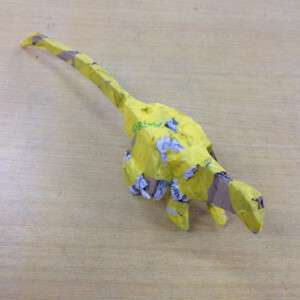
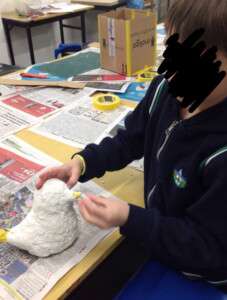
Once you’re happy with your armature, it’s time to add the paper clay. The important thing here is to add it in very thin layers. Too thick and it tends to fall off as the weight is greater, and then once the newspaper/masking tape is soggy it can be hard to get it to stick again. This is why it’s very important that the newspaper is scrunched up tight, so it keeps its shape even when soggy. Patience is needed to really squish the paper clay in place – this will help it stick and also make it smoother. So, small pieces at time. With anything that’s hoping to stand on legs (like Mateo’s komodo dragon) I suggest doing the body first, then turning upside down for the legs – so they do not hold the weight of the animal until they are dry.
It is possible to make a paper clay sculpture without the armature but it needs to be very small and simple – without support they clay will flop out of shape.
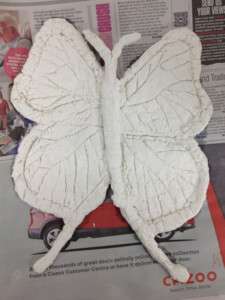
Can’t wait to see these decorated!