Tag: childrens art classes

Ink and wash – classical sculptures

Ink and wash – classical sculptures

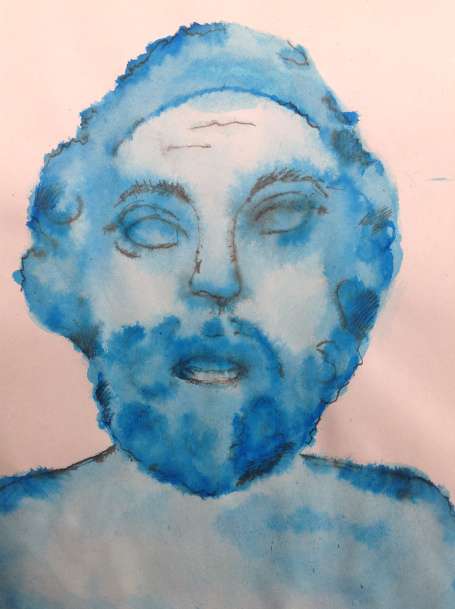
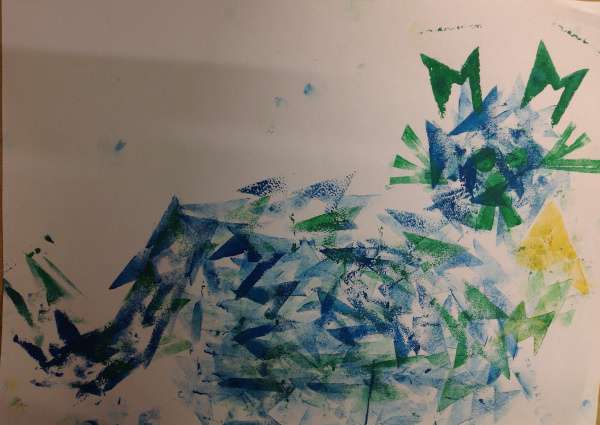
This term we are going back to basics and focusing on different painting or drawing tools. And this week it’s back to basics with our subject matter – classical sculptures. We have a few plaster casts in the studio, and I printed out some pictures of Greek and Roman statues to choose from. Taking inspiration from this Access Art session, I introduced the use of pen and ink – in which we find the shadows using a soft brush and coloured ink, using…

newspaper tonal collage – week 5

newspaper tonal collage – week 5

Continuing our theme of text, this time we used text (in the form of newspapers) for its different tonal values. Different sized text torn up will create different tonal shades – dark to light – and with that you have you palette and can create anything.Some also couldn’t resist adding a bit of colour from the newspapers! I assembled a group of fairly simple fruit, veg and white porcelain cups. As a warm up activity, we did ink and charcoal drawings of the…

Asemic writing – week 4

Asemic writing – week 4

This week I introduced the kids to asemic writing – that is wriiting which has no intelligible meaning. It looks like script, or ideograms, with specific characters but yet those characters do not correspond to any actual symbols – hence the word asemic – non-signs. It’s amazing what can be conveyed trough signs, without those signs meaning anything – they are always full of energy and emotion. I came across this through the work of Henri Michaux. He was really interested in different…

Block printing letters – week 3

Block printing letters – week 3

This week we we did block printing by sticking foam letters onto small pieces of wood. We then rolled printing ink onto them, stamped them and then repeated this several times to make a pattern. This could become a monogram but I also encouraged the kids to see the letters as simply shapes, rather than letters, and to see what kind of patterns they could create with them.Some even managed to make pictures with their letters!

Gelli printing letters

Gelli printing letters

This week we experimented with making letters via gelli plates. This is a kind of mono-printing but you use acrylic paint and instead of glass or perspex the plate is made of gelatin. This gives is a spongy texture into which you can press stencils and textured objects, as well as the usual monoprinting techniques.

Shibori – also known as tie-dye

Shibori – also known as tie-dye

We were tying ourselves in knots this week – intentionally, and imaginatively. Different knots and folds, around different objects (such as small stones and lolly sticks), and with different ties (elastic bands or cable ties) created different and amazing effects. In order to ensure the dye is reasonably colourfast – i.e. the dye won’t all run out in the wash – I soaked the fabric (100% cotton) in soda ash first. You could add soda ash to the dye instead but this means…

weaving – with wool, fabric, ribbons, threads…

weaving – with wool, fabric, ribbons, threads…

This week we made our own looms out of cardboard (cut along two edges with pinking shears) and used them to weave amazing patterns using wool, fabric, threads, ribbons – all sorts! The colours the kids combined were fantastic. This activity suits those who like to work slowly – really getting into the zone – rather than those who are easily  bored with repetitive activities. It’s also one for those who like working with different textures – all the results are just begging…

Wire and fabric sculptures

Wire and fabric sculptures

This week we used wire and fabric to make amazing sculptures. The idea came from Access Art but we didn’t use plinths this time, and the kids didn’t stick to people. The basic technique is to make a simple wire sculpture – e.g. a stick figure – and to cover it in strips of fabric ( I used a sheet from a charity shop). We used thin wire to keep wrapped around the fabric to keep it in place. Then they cut up…

Paper clay – parts 1+2

Paper clay – parts 1+2

These two weeks we were busy with paper clay sculptures. Paper clay is a kind of paper mache, but the paper is mulched first before applying to the armature. I used this recipe from Jonni Good and it worked really well. The first step is to create the armature. What worked best was cardboard and scrunched up newspaper (careful to scrunch up the newspaper as tight as you can)  but wire is also possible. Its really important that the sculpture is as tight…

Sewing sculptures

Sewing sculptures

This week and I challenged everyone to make paper/card sculptures with no glue or sellotape – only stitches! We used Barbara Hepworth for inspiration, particularly her pieces involving holes and wire, and discussed how we could achieve similar effects using toilet rolls, card and thread, as well as a hole punch for the holes.. It really is amazing what shapes and forms can be created just by cutting, folding and stiching together. And while most went for abstract,,Mateo manged to make a fish!

monoprinting from magazines

monoprinting from magazines

This week we worked with collage to make amazing, but unusual monoprints. Usually monoprinting involves painting onto a plate of glass or perspex and taking a print, or you cover that plate with ink and then make marks to remove some of it and take a print. This way is a variation on the first type but with the added addition of magazines as the base from which to work from (as paper is the term’s theme). The kids all chose images from…

Exploring paper weaving

Exploring paper weaving

This week I showed the kids some basic, and some more complex, ways of weaving with paper. With help from Naomi Kendall, who provided this helpful post on the subject, we made some beautiful designs,  using both strips of coloured paper and strips of magazines to make some v beautiful patterns. Of course, you don’t need to keep to the regular patterns I demonstrated. Some adventurous children deviated from the patterns with strips of different widths, as well as colours which did not…

Marvel at our marbling!

Marvel at our marbling!

Exciting this week as the kids tried their hands at marbling – with some always unexpected, beautiful results. Marbling is an ancient technique of paper decoration, in which paint is dropped into the ‘size’ which is water thickened with a special powder. (traditionally a type of seaweed). Because of this thickener the paint sits on top of the surface of the water and from there it’s possible to take a print. Before you do that though you can manipulate the paint on the…

Tissue paper magic!

Tissue paper magic!

Welcome to our new term! This term will be all about paper! Each week a different activity using paper (or card).. First up was tissue paper – surprisingly versatile. While of course you can make some lovely collages with tissue paper, especially using its translucency to create different colours where they overlap, and coating in diluted PVA to bring out those colours. But you can also use bleeding tissue paper to stain the paper you are working on – as one child said,…

Modroc sculpture – part 3

Modroc sculpture – part 3

Last week of term this week so yes, it’s time to paint the modroc sculptures! Everyone came with brilliant ideas of how to paint the sculptures they’ve been making the past two weeks. We used acrylic paint which is easy to paint details or corrections on top, once dry. Some even added other elements such as tissue paper wings or paper clothing. Love the results!  

Articulated creatures – ready to animate!

Articulated creatures – ready to animate!

This week we made articulated creatures – so creatures with movable limbs. This activity really tested the kids’ ability to think like an engineer. After drawing their creature normally they had to work out which parts would move, then draw those parts separately, scaled up, not forgetting to include space for the parts and the body to overlap to contain the join. Not as easy as they first thought! The joins were simple wire spirals made on the front and back. This enabled…

Watercolour magic

Watercolour magic

This week we tackled autumn leaves in watercolours. They really are the most beautiful subject, i think, and perfect for this tricky medium. There are techniques for all levels from patient layering, fluid experimentation to even printing with the leaves (and combining all these as well!). Really the only proper rule is to start with the light colours first. The beauty of watercolour is all about letting the white of the paper shine through, thereby utilising their amazing, and unique, transparency. Then you…

Playing with stencils

Playing with stencils

This week we had great fun designing and making stencils. Using craft knives very carefully and either card or acetate the kids made really fun and interesting stencils, which they then worked with very imaginatively – working out how they could overlap as well as playing with the colours (high contrast worked well) and the sponges on sticks we used were great to blend with. It’s a really versatile print making technique.

Fun with the photocopier

Fun with the photocopier

Woo we are back – old and new faces, and a new class for teenagers! First week started irreverently with ‘updating’ (which could mean defacing) our collection of art magazines. I wanted the students to choose an image that resonated with them and find a way to change or update it. This could be with scissors, marker pen and/or the photocopier.  Love what several did with splicing different images together (or the same one, changed) or using the photocopier to multiply the image.…